DIY Lash Lift and Lamination? It’s Possible! Discover the Best Kits from Top Brands
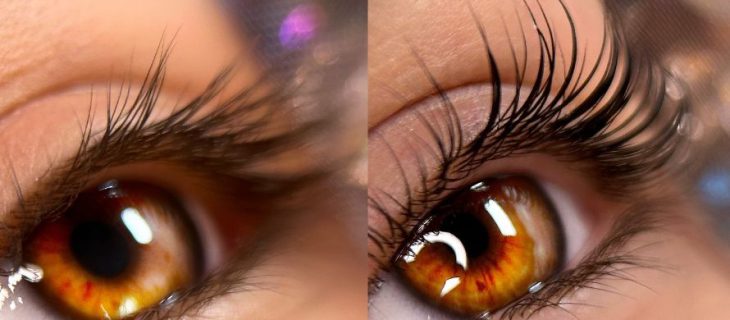
Lash lamination and lash lift are very popular beauty treatments that have been performed in beauty salons for many years. Many of you may know them under the name “lash perm.” Although both methods give stunning results, I understand that not every woman likes spending a lot of time in a beauty salon. I myself am someone who only visits a beautician when absolutely necessary. Therefore, I was very happy when I discovered that many brands offer ready-to-use kits for the lash lift and lamination. Today, I present to you my subjective ranking of the most popular lash lift kits.
Lash Lift and Lamination – basic information
Before I get into my product comparison, I want to tell you a little more about these beauty treatments. I’ll start by saying that lash lamination and lash lift are actually two different methods of styling eyelashes, although they are often performed one after the other. The goal of the lash lift is to lift and curl the lashes. During the lamination, the lashes are nourished and moisturized.
What do lashes look like after a lash lift and lamination? They are:
- Curled;
- Visually longer;
- Shiny;
- Moisturized;
- Nourished;
- Precisely separated.
Because the lashes are visually longer after the lash lift and lamination, the eye appears bigger. Additionally, the lashes are precisely separated, making the lash line appear fuller.
The benefits of the lash lift and lamination are undeniable. But why do I prefer to do them at home? First, the time spent in a beauty salon feels like wasted time to me. I sit there idly, feeling that I could be doing many other things. Secondly, it’s about the cost. Professional services are very expensive, so I’m always looking for cheaper alternatives. Thirdly, I simply enjoy doing the lamination by myself, and I encourage you to try it too.
Lash Lift and Lamination Kits for Home Use – product comparison
Whenever I have the chance to try something new at home, I do so every time. The same goes for the lash lift and lamination. It turns out that many professional beauty brands offer ready-to-use lash lift kits. So, I decided to test a few products and create a ranking to help you choose. Let’s dive in!
1. Nanolash Lash Lift Kit – lash lift and lamination kit
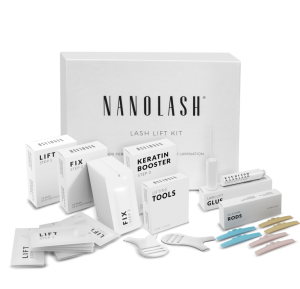
The Lash Lift Kit is a product from the renowned Nanolash brand, which I personally know well. It’s a complete and professional kit for at-home lash lift and lamination. It contains all the necessary products and accessories for performing both treatments effectively.
The kit includes 10 sachets of activator, 10 sachets of neutralizer, and 10 sachets of Keratin Booster. Additionally, the Lash Lift Kit comes with glue, 3 pairs of silicone rods (in three sizes), and 3 lash combs. This amount of product is enough for 10 individual lash laminations, making this kit very efficient.
All the products and accessories are well-labeled and numbered, so the whole lash lift process is quick and easy. The products have pleasant formulas and good ingredients, making them not only effective but also safe for the skin. They contain keratin, arginine, lanolin, panthenol, silk, and natural oils.
The kit comes in an exceptionally elegant box, making it a great gift idea. I even gave it to my friend, and she’s just as happy with it as I am.
To sum up, the results of the lash lift with Nanolash are truly amazing! The lashes become curled, making them look significantly longer. This makes the eyes appear bigger. The lashes are also precisely separated, which gives the lash line more volume. You can also notice that the condition of the lashes improves – they are shiny and well-moisturized. I was able to enjoy these fantastic results for 8 weeks.
2. MIYA LASH Keratin Lash Lift Kit
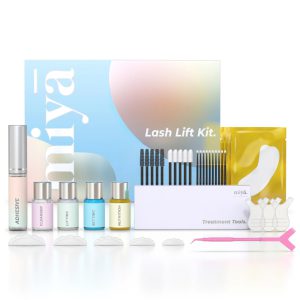
The next lash lift kit stands out with its pastel color scheme, which I find very appealing. But of course, looks aren’t everything. The MIYA LASH kit contains all the necessary products, so there’s no need to buy additional products or accessories.
The kit includes the following: glue (7 ml), remover (5 ml), Lifting-Lotion (5 ml), Fixing Serum (5 ml), 3 Y-shaped brushes, 5 lash brushes, 5 lint-free applicators, 10 micro brushes, 1 lifting pick, 4 under-eye patches, and 5 silicone rods. The number of accessories is really impressive. But is this truly an advantage?
For me, the large number of accessories was overwhelming. I had no idea which tool to use at a given moment. However, if you have more experience with lash lamination, you might be pleased.
The products included in the kit are very pleasant to use and rich in keratin. They have great formulas and are easy to apply. The effects were really good, though they lasted slightly less than with the Nanolash kit – about 6 weeks.
3. RefectoCil Eyelash Lift
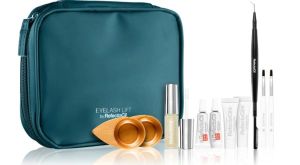
RefectoCil Eyelash Lift is a complete lash lift kit. It contains all the necessary products for the lash lamination, neatly packed in a practical makeup bag. I find this particularly useful because I can store all the elements in one place and even take them with me on vacation.
The RefectoCil kit includes Lifting formula, Neutralizer, Eyelash Lifter, glue, 3 pairs of silicone rods (in three sizes), 2 small bowls, and 2 brushes. The set is comprehensive, and the advantage is that the rods come in three sizes, allowing for a perfect fit to the shape of your eyes.
In this case, the entire lash styling process takes just about 13 minutes, thanks to the specially developed formulas. The results are good and last around 6 weeks, slightly less than the top-ranking product.
4. Brow & Lash Protein Reconstruction System by Zola – brow lamination and lash lift kit
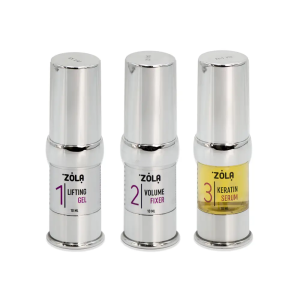
Next on the list is an ideal kit for beginners. Brow & Lash Protein Reconstruction System from Zola is a simple kit for brow lamination and lash lift at home. It only contains three products (Protein Strong Lifting, Protein Fixer, Protein Care) with built-in applicators, used just like mascara. In this case, there are no additional applicators or even silicone rods.
Using the products in this kit is therefore straightforward and easy – every woman knows how to use mascara, after all. However, the results are not as spectacular and long-lasting as with other kits in my ranking.
If you’re looking for an easy-to-apply lash lift kit or just want to try lash lamination, this product might be interesting. But if you’re expecting professional and long-lasting results, you might be disappointed.
5. Fleeky Lashlift Kit
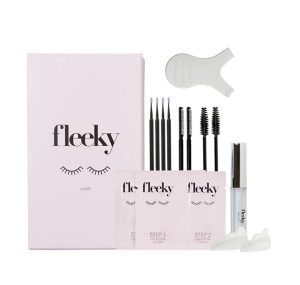
The last lash lift kit, Fleeky Lashlift Kit, is the most affordable product in my ranking. However, its low price comes with limited efficiency. The kit only includes 2 sachets of Lash Lift, glue, 3 pairs of silicone rods, 2 lash brushes, 2 lash combs, and 4 picks. These products are only enough for 2–4 lash laminations.
One huge advantage is that all the products in the Fleeky kit are vegan and cruelty-free, which is great news for women who care about the environment. I also need to point out that this product comes in a beautiful pink box, making it a lovely gift idea.
The results may not be spectacular, but they are certainly satisfying. They last about 6 weeks, which I think is a decent outcome. Overall, Fleeky Lashlift Kit is a good lash lift kit, but unfortunately, it’s not very efficient.
DIY Lash Lift and Lamination – Tips
Although the number of products for the lash lift may seem overwhelming at first, believe me, lash lamination is really simple, especially if all the products are numbered (like in the Nanolash kit). With a little practice, you can achieve the same results as a professional beautician. How should the lash lift be performed?
Lash Lift and Lamination Step-by-Step:
1. Preparation
First, you need to prepare all the necessary products. I mean both the contents of your chosen kit and items like lash shampoo, makeup remover, cotton pads, and a mirror. Then, cleanse your natural lashes thoroughly.
2. Securing the Silicone Rods
This step can be skipped only in the case of the Zola kit. Most kits, however, contain special silicone rods that need to be placed on the eyelids and covered with glue. The lashes are then combed up onto the rods.
3. Applying the Lash-Lifting Products
Once your lashes are ready, you can apply the lifting products. Make sure to read the instructions included with your kit, as each product is used slightly differently.
4. Removing the Silicone Rods
After applying and removing all the lifting products, you can remove the silicone rods. Then, gently comb through your lashes. It’s important to avoid contact with water for at least 24 hours – this ensures the ready lash look sets properly.
Now, you can enjoy your curled and laminated lashes for several weeks. Good luck with your at-home lash lamination, and I look forward to hearing your thoughts on your favorite lash-styling kits. Hugs!



Leave a Reply